
Python-Scrapy
1.安装依赖
pip install twisted
pip install pywin32
pip install scrapy
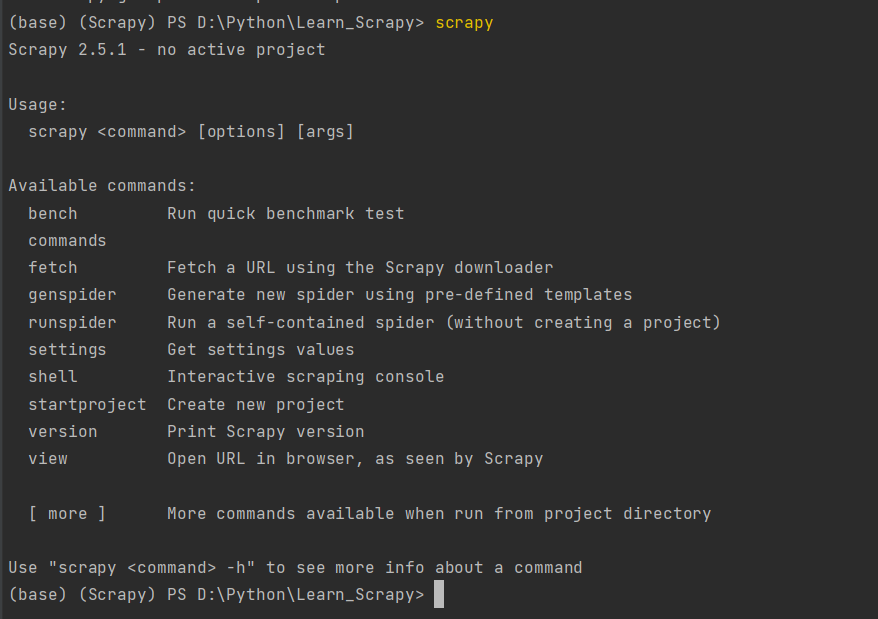
再控制台输入Scrapy,出现如下效果即为安装正确:
2.创建一个工程
scrapy startproject 工程名
目录结构:
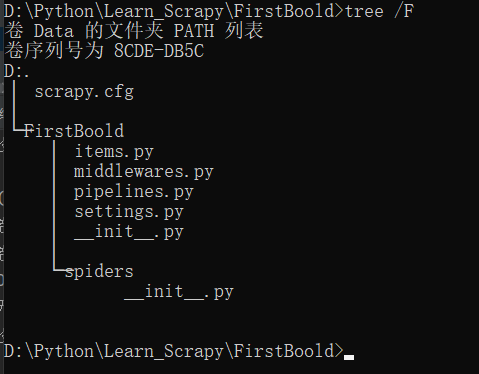
scrapy.cfg     # Scrapy 部署时的配置文件
tutorial         # 项目的模块,引入的时候需要从这里引入
    __init__.py
    items.py     # Items 的定义,定义爬取的数据结构
    middlewares.py   # Middlewares 的定义,定义爬取时的中间件
    pipelines.py       # Pipelines 的定义,定义数据管道
    settings.py       # 配置文件
    spiders         # 放置 Spiders 的文件夹
    __init__.py
3.创建一个爬虫文件
进入工程目录
在spiders子目录中创建一个爬虫文件
scrapy genspider spiderName 域名
例:
scrapy genspider first www.baidu.com
Created spider 'first' using template 'basic' in module:
  FirstBoold.spiders.first

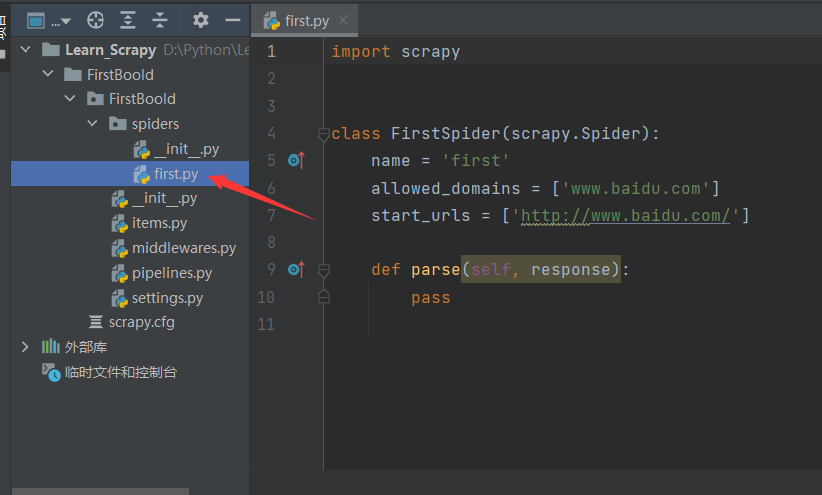
这样就创建了一个爬虫文件
4.执行工程
scrapy crawl spiderName
5.爬虫文件内容解析
import scrapy


class FirstSpider(scrapy.Spider):
    # 爬虫文件的名称:爬虫源文件的唯一标识
    name = 'first'
    # 允许的域名:用来限定start_urls列表中那些url可以被请求发送
    allowed_domains = ['www.baidu.com']
    # 起始的url列表:该列表中存放的url会被scrapy自动进行请求的发送
    start_urls = ['http://www.baidu.com/']

    # 用作于数据解析,response参数表示的就是请求成功后对应的响应对象
    def parse(self, response):
        pass
6.修改爬虫文件并运行
将爬虫文件修改为以下内容:
import scrapy


class FirstSpider(scrapy.Spider):
    name = 'first'
    allowed_domains = ['www.baidu.com']
    start_urls = ['http://www.baidu.com/','https://www.bilibili.com/']

    def parse(self, response):
        print(response)    # 打印相应结果
在控制台中执行:**scrapy crawl first**
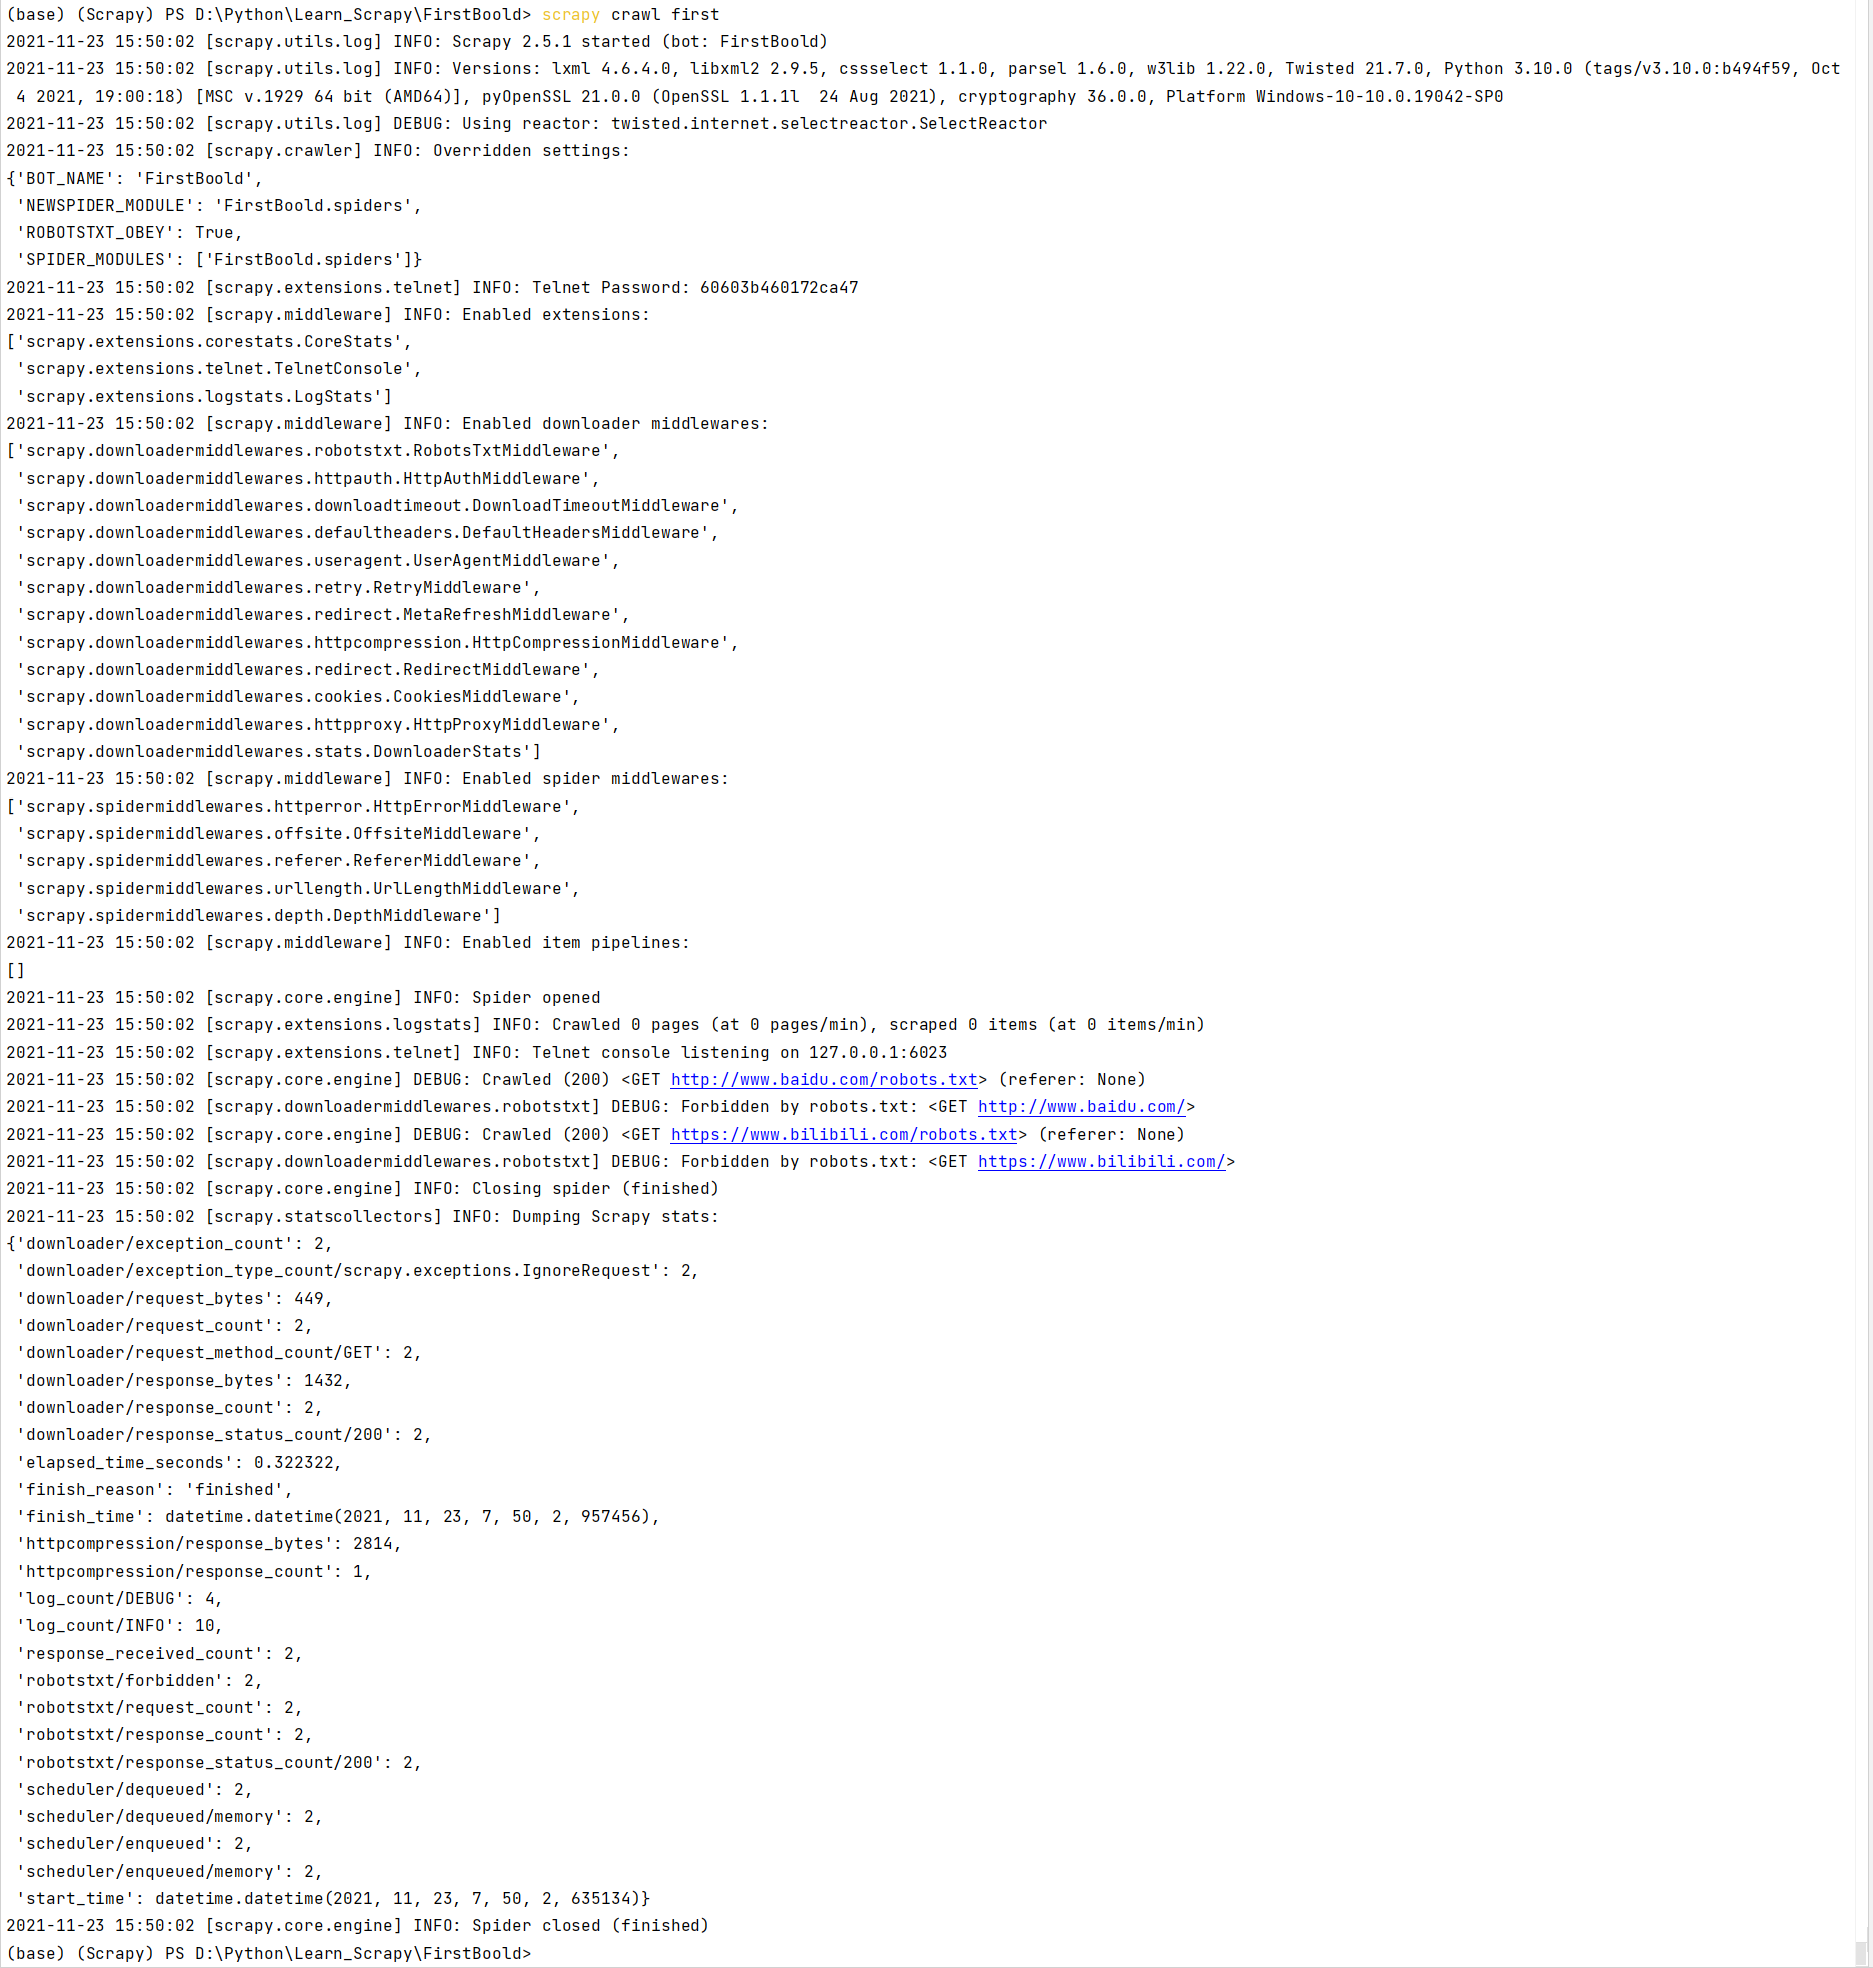
发现输出了一大堆东西,但是没有我们打印的response结果,仔细观察输出结果,发现下图输出了 'ROBOTSTXT_OBEY': True,这代表爬虫将遵守Robot协议,我们配置为Flase不遵守此协议即可。

这就是导致没有输出结果的原因。
我们只需要修改配置文件即可:
打开工程项目下的settings.py文件
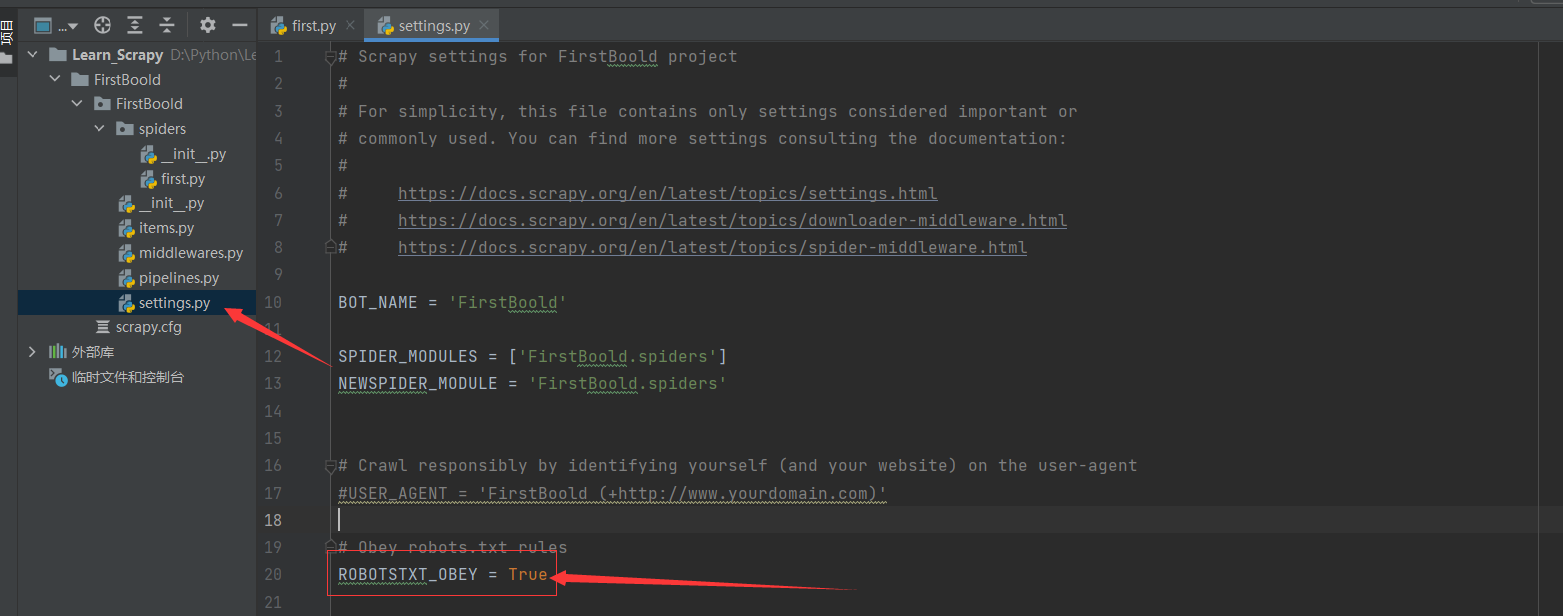
将ROBOTSTXT_OBEY = True修改为ROBOTSTXT_OBEY = False即可。
再次执行:

这次运行我们加了--nolog参数,屏蔽了程序执行的日志,这样控制台只会输出我们想要的内容,但是不推荐使用--nolog,因为程序有问题,不会报错,导致无法排错。
通过上图发现程序正常运行,并输出了我们想要的结果。
7.Scrapy的数据解析
任务目标:
- 爬取糗事百科中段子类中的发帖人和发帖内容
创建工程和爬虫文件:
scrapy startproject qiubaiPro    # 创建工程
scrapy genspider qiubai www.xxx.com    # 创建爬虫文件
编辑爬虫文件
import scrapy


class QiubaiSpider(scrapy.Spider):
    name = 'qiubai'
    # allowed_domains = ['www.xxx.com']
    # 待爬取的Url
    start_urls = ['https://www.qiushibaike.com/text/']

    def parse(self, response):
        # 解析作者的名称+段子内容
        # 获取节点
        div_list = response.xpath('/html/body/div[1]/div/div[2]/div')
        # 遍历节点
        for div in div_list:
            # 获取作者名和段子内容
            # extract可以将Selector对象中所存储的data对象提取出来
            # 如果是对列表使用extract,可以将列表中所有Selector对象中所存储的data对象提取出来
            author = div.xpath('./div[1]/a[2]/h2/text()')[0].extract()
            author = div.xpath('./div[1]/a[2]/h2/text()').extract_first()    # 同上
            content = div.xpath('./a[1]/div/span[1]//text()')[0]
            print(author.strip(), content.strip())
            break
修改配置文件setting.py:
# UA
USER_AGENT = 'Mozilla/5.0 (Windows NT 10.0; Win64; x64) AppleWebKit/537.36 (KHTML, like Gecko) Chrome/95.0.4638.69 Safari/537.36'
# Robots协议
ROBOTSTXT_OBEY = False
# 显示日志等级
LOG_LEVEL = "ERROR"
运行工程:scrapy crawl qiubai:

发现段子内容打印的是一个Selector对象,而作者名并没有被Selector包裹,说明extract()是提取Selector中的data内容。
8.持久化存储
1.基于终端命令存储
只能将parse方法的返回值存储在本地文件中
修改爬虫文件:
import scrapy


class QiubaiSpider(scrapy.Spider):
    name = 'qiubai'
    # allowed_domains = ['www.xxx.com']
    start_urls = ['https://www.qiushibaike.com/text/']

    def parse(self, response):
        # 解析作者的名称+段子内容
        div_list = response.xpath('/html/body/div[1]/div/div[2]/div')
        data_all = []
        for div in div_list:
            author = div.xpath('./div[1]/a[2]/h2/text()')[0].extract()
            author1 = div.xpath('./div[1]/a[2]/h2/text()').extract_first()
            content = div.xpath('./a[1]/div/span[1]//text()').extract()
            content = ''.join(content)
            dit = {
                'author':author,
                'content':content
            }
            data_all.append(dit)
        return data_all
终端执行:scrapy crawl qiubai -o data.json:

查看当前目录,已经生成了data.json文件:
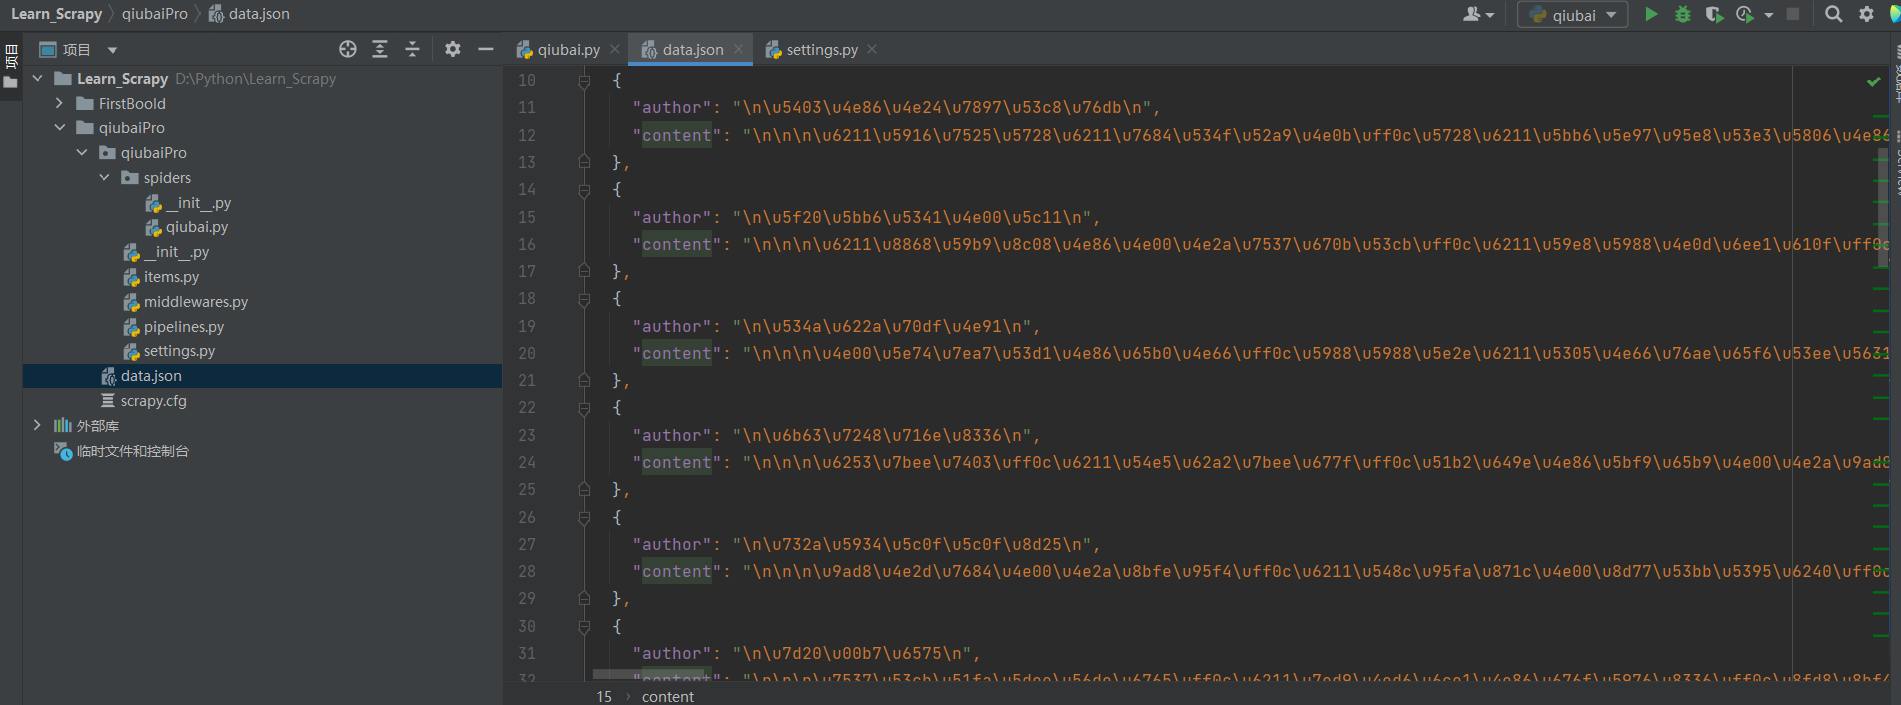
假如我们要保存成txt行不行呢?
试一下:

发现报错了,提示只支持json, jsonlines, jl, csv, xml, marshal, pickle这几种文件。
2.基于管道存储
- 编码流程
- 数据解析
- 在item类中定义相关属性
- 将解析的数据封装存储到item类型的对象
- 将item类型的对象提交给管道进行持久化存储操作
- 在管道类的process_item中要将其接受到的item对象中存储的数据进行持久化存储
- 在配置文件中开启管道
例:
数据解析
修改qiubai文件:
import scrapy
from qiubaiPro.items import QiubaiproItem


class QiubaiSpider(scrapy.Spider):
    name = 'qiubai'
    # allowed_domains = ['www.xxx.com']
    start_urls = ['https://www.qiushibaike.com/text/']
    def parse(self, response):
        item = QiubaiproItem()
        # 解析作者的名称+段子内容
        div_list = response.xpath('/html/body/div[1]/div/div[2]/div')
        data_all = []
        for div in div_list:
            author = div.xpath('./div[1]/a[2]/h2/text()')[0].extract()
            author1 = div.xpath('./div[1]/a[2]/h2/text()').extract_first()
            content = div.xpath('./a[1]/div/span[1]//text()').extract()
            content = ''.join(content)
            item['author'] = author
            item['content'] = content
            yield item  # 将item提交给管道
在item类中定义相关属性
打开工程目录下的item文件:
import scrapy


class QiubaiproItem(scrapy.Item):
    # define the fields for your item here like:
    # name = scrapy.Field()
    # 创建2个属性
    author = scrapy.Field()
    content = scrapy.Field()
将解析的数据封装存储到item类型的对象
这一步其实就是第一步qiubai文件中的第2行和10和19-20行:
from qiubaiPro.items import QiubaiproItem导入item文件中的QiubaiproItem类item = QiubaiproItem()创建一个item对象item['author'] = author和item['content'] = content给对象的author和content属性赋值
将item类型的对象提交给管道进行持久化存储操作
yield item返回item对象
在管道类pipelines的process_item中要将其接受到的item对象中存储的数据进行持久化存储
修改工程目录下的pipelines.py文件
# Define your item pipelines here
#
# Don't forget to add your pipeline to the ITEM_PIPELINES setting
# See: https://docs.scrapy.org/en/latest/topics/item-pipeline.html


# useful for handling different item types with a single interface
from itemadapter import ItemAdapter


class QiubaiproPipeline:
    f = None

    # 开启爬虫时执行,只执行一次
    # 重写父类方法
    def open_spider(self, spider):
        print("开始爬虫.....")
        self.f = open('qiubai.txt', 'w', encoding='utf-8')

    # 专门用来处理item对象
    # 该方法可以接收爬虫文件提交过来的item对象
    # 该方法每接到一个item对象就会调用一次
    def process_item(self, item, spider):
        author = item['author']
        content = item['content']
        self.f.write(author + ':' + content + '\n')
        return item

    # 关闭爬虫时执行,只执行一次。 (如果爬虫中间发生异常导致崩溃,close_spider可能也不会执行)
    def close_spider(self, spider):
        print("爬虫结束....")
        self.f.close()
在配置文件中开启管道
修改工程目录下settings.py文件
将
ITEM_PIPELINES = {
    # 300表示是优先级,数值越小,优先级越高
    'qiubaiPro.pipelines.QiubaiproPipeline': 300,
}
取消注释
3.将爬取的数据存两份
任务目标:将爬取的数据一份存到txt文件,一份存到mysql数据库
基于上一节的代码进行修改
在pipelines.py添加代码:
import pymysql


class MysqlPipeline:
    conn = None
    cour = None

    def open_spider(self, spider):
        self.conn = pymysql.connect(host="127.0.0.1", port=3306, user='root', password='123456', db='qiubai',
                                    charset='utf8')

    def process_item(self, item, spider):
        self.cour = self.conn.cursor()
        try:
            self.cour.execute('insert into qiubai value ("%s","%s")' % (item['author'], item['content']))
            self.conn.commit()
        except Exception as e:
            print(e)
            self.conn.rollback()
        return item
    # 这里的item代表将item传给下一个类,在QiubaiproPipeline类中的MysqlPipeline方法,最终返回了item,如果不返回item,那MysqlPipeline类就接受不到item对象。

    def close_spider(self, spider):
        self.cour.close()
        self.conn.close()
修改setting.py文件:
ITEM_PIPELINES = {
    # 300表示是优先级,数值越小,优先级越高
    'qiubaiPro.pipelines.QiubaiproPipeline': 300,
    'qiubaiPro.pipelines.MysqlPipeline': 301,    # 添加这一条,优先级设置为301,代表爬取的数据会先执行QiubaiproPipeline类,然后执行MysqlPipeline类
}

查看mysql数据库中是否已有存取数据:
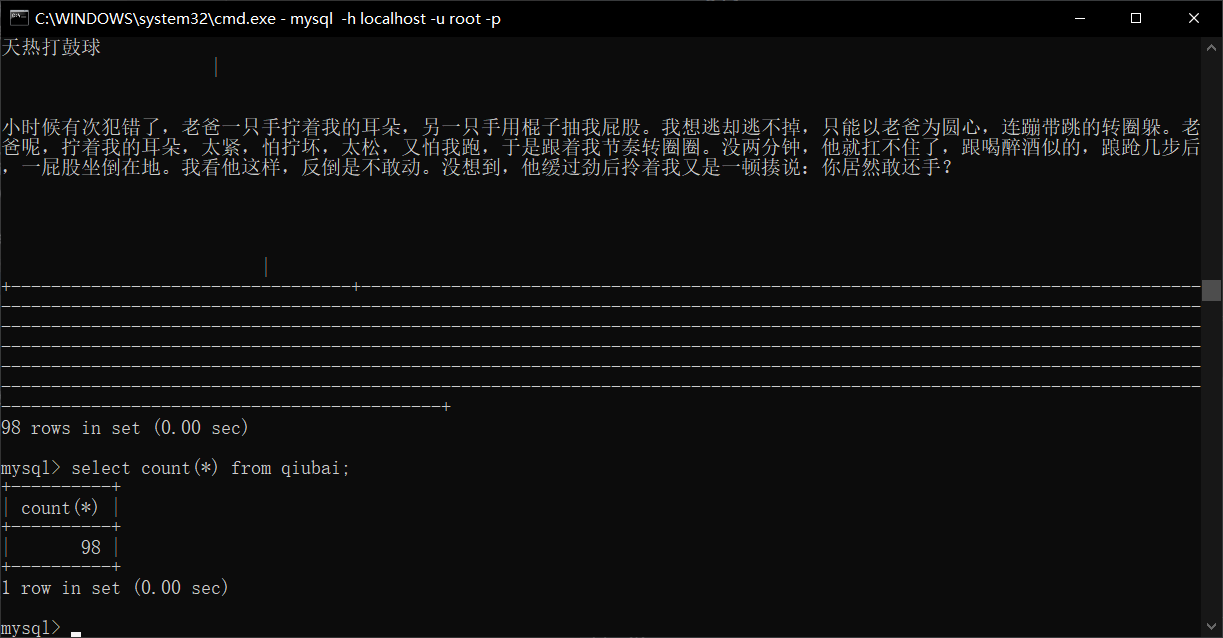
这里我运行了多次,所以qiubai表存在98条数据,总之,证明了程序成功爬取数据并存到了mysql中。
9.全站数据爬取
就是将网站中某板块下的全部页码对应的数据进行爬取


